前言 前面两篇文章,简单说SpringBoot在web容器中启动,也就是把代码打成war包放到Tomcat/Jetty的服务器上启动,现在随着容器化越来越成熟,应用越来越多使用jar包的形式去部署,也就是jar包内包含web容器,通用命令 java -jar app.jar这种方式去启动服务。而且这种也更好的实现动态部署和弹性升级控制。一般我们把这种集成了web容器的jar包叫FatJar。顺便说下jar包也是zip压缩的变种所以使用zip解压工具直接打开。
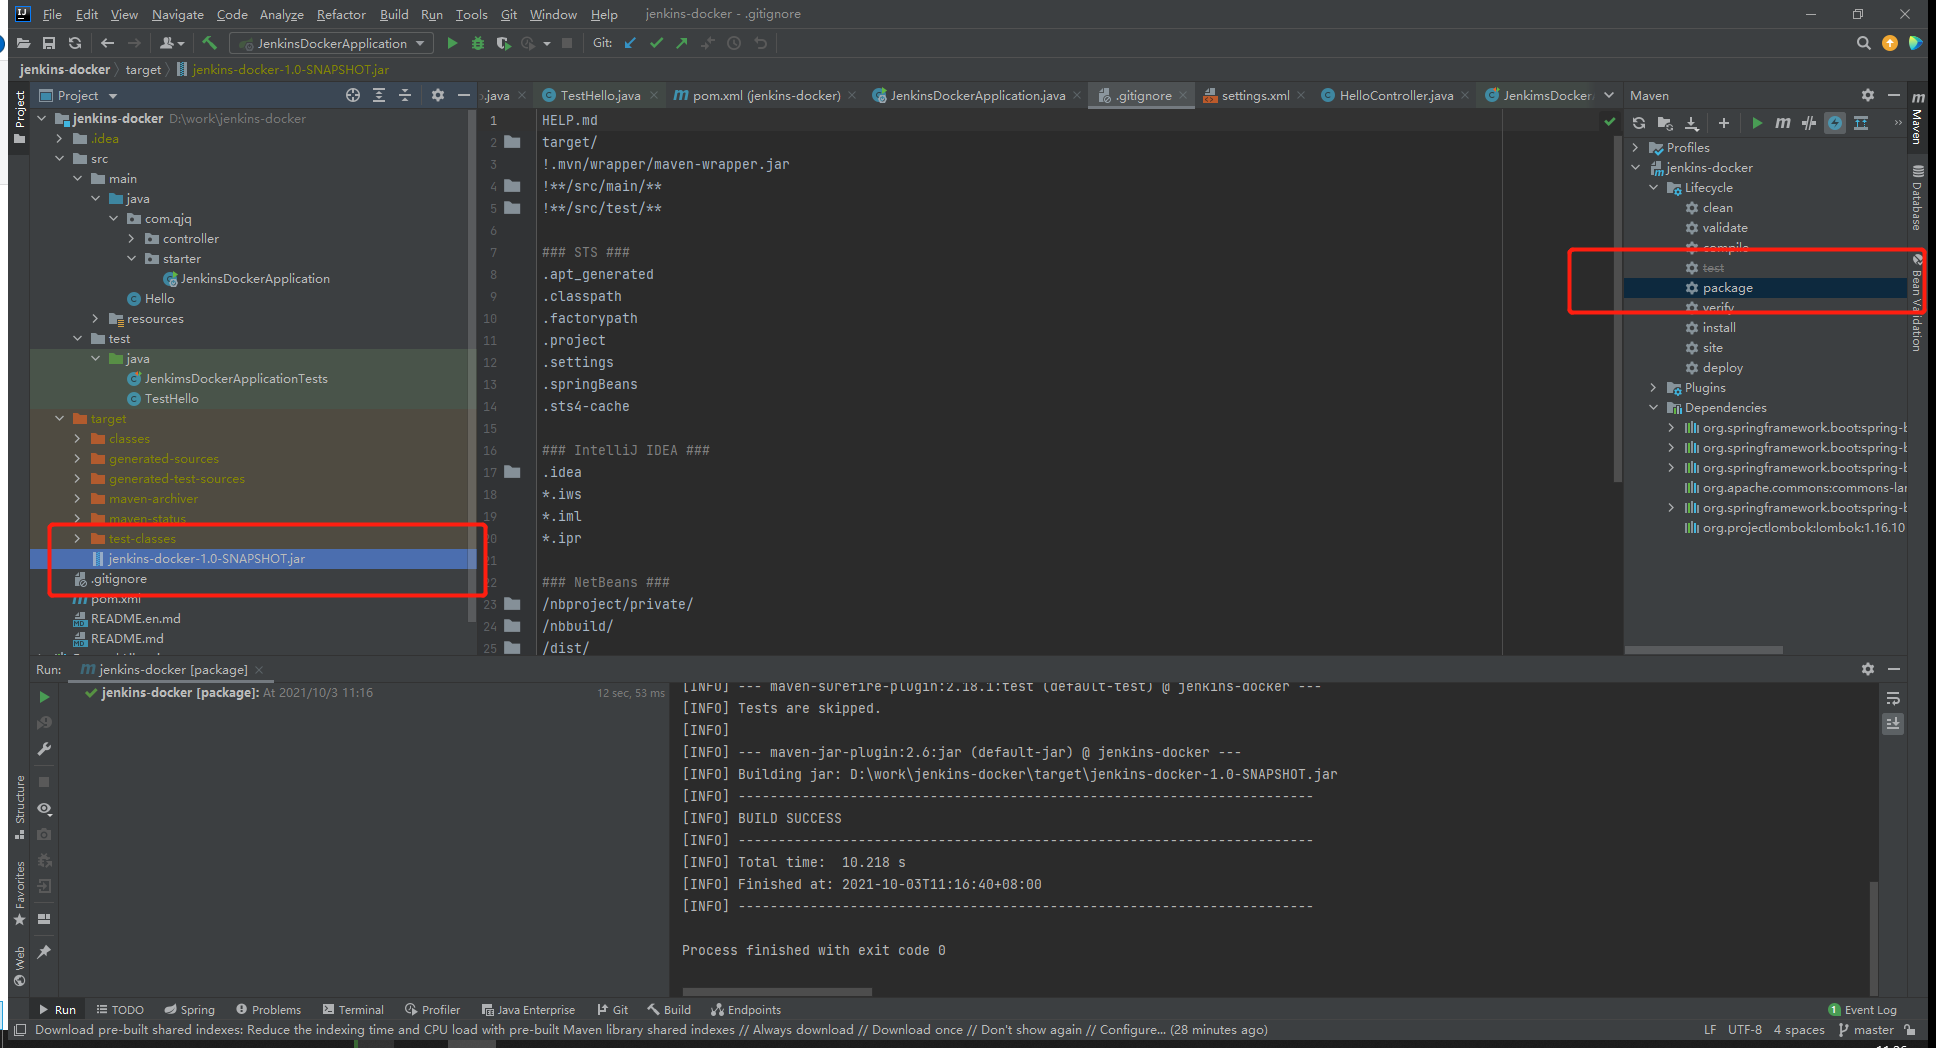
FatJar的结构 如何获取一个FatJar,这个简单只要在maven的控制栏执行一下package命令就可以了。
我们找到对应的目录,Idea是把这个jar包放到Target的临时目录里面。我们解压jar包,使用tree命令去执行。如果你执行玩发现没有对应的lib打进来,或者不是一个可以执行jar只有class文件。在打包的pom文件中加入这段代码
1 2 3 4 5 6 7 8 9 10 11 12 13 14 15 16 <build > <plugins > <plugin > <groupId > org.springframework.boot</groupId > <artifactId > spring-boot-maven-plugin</artifactId > <version > 1.5.4.RELEASE</version > <executions > <execution > <goals > <goal > repackage</goal > </goals > </execution > </executions > </plugin > </plugins > </build >
下面是执行tree的后得到的目录
1
2
3
4
5
6
7
8
9
10
11
12
13
14
15
16
17
18
19
├─BOOT-INF │ ├─classes │ │ └─com │ │ └─qjq │ │ ├─controller │ │ └─starter │ └─lib ├─META-INF │ └─maven │ └─com.qjq │ └─jenkins-docker └─org └─springframework └─boot └─loader ├─archive ├─data ├─jar └─util
清单文件(Manifest file)。
Manifest文件被用来定义扩展或文件打包相关数据,是一个元数据文件,它包含了不同部分中的名/值对数据。如果一个JAR文件被用来作为可执行文件,那么其中的Manifest文件需要指出该程序的主类文件。通常Manifest文件的文件名为MANIFEST.MF
JAR应用程序: 如果JAR文件被用作可执行的应用程序,那么应用程序需要告诉Java虚拟机入口点位置。任意包含public static void main(String[] args)方法的类即为入口点。该信息由文件头Main-Class提供
org.springframework.boot.loader.JarLauncher就是主类,JarLauncher类的main方法就是整个程序的开始。
1
2
3
4
5
6
7
8
9
10
11
12
13
14
15
16
17
Manifest-Version : 1.0 Implementation-Title : jenkins-docker Implementation-Version : 1.0-SNAPSHOT Archiver-Version : Plexus Archiver Built-By : Hill Implementation-Vendor-Id : com.qjq Spring-Boot-Version : 1.5.4.RELEASE Implementation-Vendor : Pivotal Software, Inc. Main-Class : org.springframework.boot.loader.JarLauncher Start-Class : com.qjq.starter.JenkinsDockerApplication Spring-Boot-Classes : BOOT-INF/classes/ Spring-Boot-Lib : BOOT-INF/lib/ Created-By : Apache Maven 3.6.3 Build-Jdk : 1.8.0_121 Implementation-URL : http://projects.spring.io/spring-boot/jenkins-dock er/
在loader包中会有一个JarLauncher.class文件,上面说到这个是程序的启动类,用反编译的软件可以产看里面的代码。
JarLauncher相关的启动源码 JarLauncher.class源码
1
2
3
4
5
6
7
8
9
10
11
12
13
14
15
16
17
18
19
20
21
22
23
24
25
26
27
package org.springframework.boot.loader;import org.springframework.boot.loader.archive.Archive;public class JarLauncher extends ExecutableArchiveLauncher static final String BOOT_INF_CLASSES = "BOOT-INF/classes/" ; static final String BOOT_INF_LIB = "BOOT-INF/lib/" ; public JarLauncher () protected JarLauncher (Archive archive) super (archive); } protected boolean isNestedArchive (Archive.Entry entry) if (entry.isDirectory()) return entry.getName().equals("BOOT-INF/classes/" ); return entry.getName().startsWith("BOOT-INF/lib/" ); } public static void main (String[] args) throws Exception (new JarLauncher()).launch(args); } }
Launcher.class的源码
1
2
3
4
5
6
7
8
9
10
11
12
13
14
15
16
17
18
19
20
21
22
23
24
25
26
27
28
29
30
31
32
33
34
35
36
37
38
39
40
41
42
43
44
45
46
47
48
49
50
51
52
53
54
55
56
57
58
59
60
61
package org.springframework.boot.loader;import java.io.File;import java.net.URI;import java.net.URL;import java.security.CodeSource;import java.security.ProtectionDomain;import java.util.ArrayList;import java.util.List;import org.springframework.boot.loader.archive.Archive;import org.springframework.boot.loader.archive.ExplodedArchive;import org.springframework.boot.loader.archive.JarFileArchive;import org.springframework.boot.loader.jar.JarFile;public abstract class Launcher protected void launch (String[] args) throws Exception JarFile.registerUrlProtocolHandler(); ClassLoader classLoader = createClassLoader(getClassPathArchives()); launch(args, getMainClass(), classLoader); } protected ClassLoader createClassLoader (List<Archive> archives) throws Exception List<URL> urls = new ArrayList<URL>(archives.size()); for (Archive archive : archives) urls.add(archive.getUrl()); return createClassLoader(urls.<URL>toArray(new URL[urls.size()])); } protected ClassLoader createClassLoader (URL[] urls) throws Exception return new LaunchedURLClassLoader(urls, getClass().getClassLoader()); } protected void launch (String[] args, String mainClass, ClassLoader classLoader) throws Exception Thread.currentThread().setContextClassLoader(classLoader); createMainMethodRunner(mainClass, args, classLoader).run(); } protected MainMethodRunner createMainMethodRunner (String mainClass, String[] args, ClassLoader classLoader) return new MainMethodRunner(mainClass, args); } protected abstract String getMainClass () throws Exception protected abstract List<Archive> getClassPathArchives () throws Exception protected final Archive createArchive () throws Exception ProtectionDomain protectionDomain = getClass().getProtectionDomain(); CodeSource codeSource = protectionDomain.getCodeSource(); URI location = (codeSource == null ) ? null : codeSource.getLocation().toURI(); String path = (location == null ) ? null : location.getSchemeSpecificPart(); if (path == null ) throw new IllegalStateException("Unable to determine code source archive" ); File root = new File(path); if (!root.exists()) throw new IllegalStateException("Unable to determine code source archive from " + root); return root.isDirectory() ? (Archive)new ExplodedArchive(root) : (Archive)new JarFileArchive(root); } }
ExplodedArchive.class 代码片段
1 2 3 4 5 6 7 8 9 10 11 12 13 public ExplodedArchive (File root, boolean recursive) if (!root.exists() || !root.isDirectory()) throw new IllegalArgumentException("Invalid source folder " + root); this .root = root; this .recursive = recursive; this .manifestFile = getManifestFile(root); } private File getManifestFile (File root) File metaInf = new File(root, "META-INF" ); return new File(metaInf, "MANIFEST.MF" ); }
ExecutableArchiveLauncher.class源码片段
1 2 3 4 5 6 7 8 9 10 protected String getMainClass () throws Exception Manifest manifest = this .archive.getManifest(); String mainClass = null ; if (manifest != null ) mainClass = manifest.getMainAttributes().getValue("Start-Class" ); if (mainClass == null ) throw new IllegalStateException("No 'Start-Class' manifest entry specified in " + this ); return mainClass; }
指定JenkinsDockerApplication为主类,启动其main方法,实现java -jar的命令。这个主类就是平时开发指定的启动类。这个是通过maven打包设置到清单文件中,也可以说是约定大于配置的一种体现把。从启动类里我们就可以深入了解spring-boot是怎么启动的,也就是run方法SpringApplication.run(JenkinsDockerApplication.class, args);
SpringApplication的执行的大致过程 1、调用SpringApplication.run的静态方法SpringApplication.run(JenkinsDockerApplication.class, args);run方法返回ConfigurableApplicationContext上下文对象
2、使用默认的SpringApplication构造函数创建SpringApplication对象,初始化和设置初始化值。如判断是否是web环境,设置默认的listener。
return new SpringApplication(sources).run(argsh);
3、根据SpringApplication对象调用run方法。
4、开始计时,配置头确实配置文件,获取自定义的runListener。从入参中获取,通知listeners开始运行
5、创建默认参数,准备环境信息(如果是web环境,将普通上下文转成Web的上下文),获取banner信息.通知listeners环境已经准备好了
6、准备Context,设置环境,初始化初始化方法,通知listeners上下文已准备。使用loader方法,向上下文中加载Bean的定义,加载完成后通知listeners,上下文已经本加载。也就是那个HashMap。
7、刷新上下文,这个就是SpringBean定义转化成真实对象的过程,这个一般会根据定义创建Bean实例。存放到一个三级的缓存中。防止Bean初始化冲突
8、执行上下文刷新之后操作,主要是实现ApplicationRunner和CommandLineRunner的实现类,进行钩子调用。
9、通知listeners上下文完成初始化和加载,计时停止,如果有异常进行异常处理。
我们从这个9步可以看出来,Spring大致的启动过程,而且在每一步都会通知SpringApplicationRunListeners。同时Spring 中也增加了大量的钩子方法,在各个过程中使用,通过Listener和Runner去实现各个过程的中间的处理。
SpringApplication.class源码分析 由于SpringApplication.class代码非常长,后面源码都会以代码段的形式出现,这样容易分析。我会在代码段前面标注来自类和包信息。
SpringApplication.class的run方法,这个是启动整个工程的方法,里面有如何初始化环境,设置参数等等。我们能从spring的源码看出来作者把这些都抽象成一个函数。这样更方便阅读,而不是把所有代码都写道一个代码块中。
这里没有涉及到refresh()方法的源码分析,想看refresh的可以跳过了。
run()方法之前初始化的一些操作 1 2 3 4 5 6 7 8 9 10 11 12 13 14 15 16 17 18 19 20 21 22 23 24 25 26 27 28 29 30 31 32 33 34 35 36 37 @SpringBootApplication(scanBasePackages = "com.qjq") @EnableTransactionManagement public class JenkinsDockerApplication public static void main (String[] args) SpringApplication.run(JenkinsDockerApplication.class, args); } } public static ConfigurableApplicationContext run (Object source, String... args) return run(new Object[] { source }, args); } public static ConfigurableApplicationContext run (Object[] sources, String[] args) return new SpringApplication(sources).run(args); } public SpringApplication (Object... sources) initialize(sources); }
初始化initialize方法 initialize方法默认的Listener、环境信息和初始化的资源信息。SpringApplication.class
1 2 3 4 5 6 7 8 9 10 11 12 13 14 15 16 17 18 19 20 21 22 23 24 25 26 27 28 29 30 31 32 33 34 35 36 37 38 39 40 41 42 43 private void initialize (Object[] sources) if (sources != null && sources.length > 0 ) { this .sources.addAll(Arrays.asList(sources)); } this .webEnvironment = deduceWebEnvironment(); setInitializers((Collection) getSpringFactoriesInstances( ApplicationContextInitializer.class)); setListeners((Collection) getSpringFactoriesInstances(ApplicationListener.class)); this .mainApplicationClass = deduceMainApplicationClass(); } private static final String[] WEB_ENVIRONMENT_CLASSES = { "javax.servlet.Servlet" , "org.springframework.web.context.ConfigurableWebApplicationContext" }; private boolean deduceWebEnvironment () for (String className : WEB_ENVIRONMENT_CLASSES) { if (!ClassUtils.isPresent(className, null )) { return false ; } } return true ; } private Class<?> deduceMainApplicationClass() { try { StackTraceElement[] stackTrace = new RuntimeException().getStackTrace(); for (StackTraceElement stackTraceElement : stackTrace) { if ("main" .equals(stackTraceElement.getMethodName())) { return Class.forName(stackTraceElement.getClassName()); } } } catch (ClassNotFoundException ex) { } return null ; }
获取ApplicationContextInitializer相关的初始化类
1 2 3 4 5 6 7 org.springframework.context.ApplicationContextInitializer =\ org.springframework.boot.autoconfigure.SharedMetadataReaderFactoryContextInitializer,\ org.springframework.boot.autoconfigure.logging.AutoConfigurationReportLoggingInitializer org.springframework.context.ApplicationListener =\ org.springframework.boot.autoconfigure.BackgroundPreinitializer
run方法 说完初始化,然后在去执行run()方法。下面是run方法代码执行过程,基本上SpringBoot的启动就是这个逻辑·SpringApplication.class
1 2 3 4 5 6 7 8 9 10 11 12 13 14 15 16 17 18 19 20 21 22 23 24 25 26 27 28 29 30 31 32 33 34 35 36 37 38 39 40 41 42 43 44 45 46 47 48 49 50 51 52 53 54 55 56 public ConfigurableApplicationContext run (String... args) StopWatch stopWatch = new StopWatch(); stopWatch.start(); ConfigurableApplicationContext context = null ; FailureAnalyzers analyzers = null ; configureHeadlessProperty(); SpringApplicationRunListeners listeners = getRunListeners(args); listeners.starting(); try { ApplicationArguments applicationArguments = new DefaultApplicationArguments( args); ConfigurableEnvironment environment = prepareEnvironment(listeners, applicationArguments); Banner printedBanner = printBanner(environment); context = createApplicationContext(); analyzers = new FailureAnalyzers(context); prepareContext(context, environment, listeners, applicationArguments, printedBanner); refreshContext(context); afterRefresh(context, applicationArguments); listeners.finished(context, null ); stopWatch.stop(); if (this .logStartupInfo) { new StartupInfoLogger(this .mainApplicationClass) .logStarted(getApplicationLog(), stopWatch); } return context; } catch (Throwable ex) { handleRunFailure(context, listeners, analyzers, ex); throw new IllegalStateException(ex); } }
配置系统属性的代码 configureHeadlessProperty方法。SpringApplication.class
1 2 3 4 5 6 7 8 private void configureHeadlessProperty () System.setProperty(SYSTEM_PROPERTY_JAVA_AWT_HEADLESS, System.getProperty( SYSTEM_PROPERTY_JAVA_AWT_HEADLESS, Boolean.toString(this .headless))); } private static final String SYSTEM_PROPERTY_JAVA_AWT_HEADLESS = "java.awt.headless" ;private boolean headless = true ;
获取SpringApplicationRunListeners的方法 获取SpringApplicationRunListeners主要是通过对应的SpringFactories去获取,主要是获取spring.factories文件中配置的文件去获取,一般是获取当前目录的文件。SpringApplicationRunListeners可以自定义。默认是使用EventPublishingRunListener,RunListeners可以是多个。SpringApplication.class
1 2 3 4 5 6 7 private SpringApplicationRunListeners getRunListeners (String[] args) Class<?>[] types = new Class<?>[] { SpringApplication.class, String[].class }; return new SpringApplicationRunListeners(logger, getSpringFactoriesInstances( SpringApplicationRunListener.class, types, this , args)); }
准备环境方法prepareEnvironment方法 准备环境将主要是对是否是web环境,做对应转换,通知listeners环境准备好了,做钩子方法。SpringApplication.class
1 2 3 4 5 6 7 8 9 10 11 12 13 14 15 16 17 18 19 20 21 22 23 24 25 26 27 28 29 30 31 32 33 34 35 36 37 38 39 40 41 42 43 44 45 46 47 48 49 50 51 52 53 54 private ConfigurableEnvironment prepareEnvironment ( SpringApplicationRunListeners listeners, ApplicationArguments applicationArguments) ConfigurableEnvironment environment = getOrCreateEnvironment(); configureEnvironment(environment, applicationArguments.getSourceArgs()); listeners.environmentPrepared(environment); if (!this .webEnvironment) { environment = new EnvironmentConverter(getClassLoader()) .convertToStandardEnvironmentIfNecessary(environment); } return environment; } private ConfigurableEnvironment getOrCreateEnvironment () if (this .environment != null ) { return this .environment; } if (this .webEnvironment) { return new StandardServletEnvironment(); } return new StandardEnvironment(); } StandardEnvironment convertToStandardEnvironmentIfNecessary ( ConfigurableEnvironment environment) if (environment instanceof StandardEnvironment && !isWebEnvironment(environment, this .classLoader)) { return (StandardEnvironment) environment; } return convertToStandardEnvironment(environment); } private static final String CONFIGURABLE_WEB_ENVIRONMENT_CLASS = "org.springframework.web.context.ConfigurableWebEnvironment" ; private boolean isWebEnvironment (ConfigurableEnvironment environment, ClassLoader classLoader) try { Class<?> webEnvironmentClass = ClassUtils .forName(CONFIGURABLE_WEB_ENVIRONMENT_CLASS, classLoader); return (webEnvironmentClass.isInstance(environment)); } catch (Throwable ex) { return false ; } }
打印banner代码 获取打印banner对象和打印banner的具体信息,会在Spring初始化的时候打印信息。SpringApplication.class
1 2 3 4 5 6 7 8 9 10 11 12 13 14 15 16 private Banner printBanner (ConfigurableEnvironment environment) if (this .bannerMode == Banner.Mode.OFF) { return null ; } ResourceLoader resourceLoader = this .resourceLoader != null ? this .resourceLoader : new DefaultResourceLoader(getClassLoader()); SpringApplicationBannerPrinter bannerPrinter = new SpringApplicationBannerPrinter( resourceLoader, this .banner); if (this .bannerMode == Mode.LOG) { return bannerPrinter.print(environment, this .mainApplicationClass, logger); } return bannerPrinter.print(environment, this .mainApplicationClass, System.out); }
banner的打印方法,默认我们能看到这是个log.info的方法 SpringApplicationBannerPrinter.class
1 2 3 4 5 6 7 8 9 10 11 public Banner print (Environment environment, Class<?> sourceClass, Log logger) Banner banner = getBanner(environment, this .fallbackBanner); try { logger.info(createStringFromBanner(banner, environment, sourceClass)); } catch (UnsupportedEncodingException ex) { logger.warn("Failed to create String for banner" , ex); } return new PrintedBanner(banner, sourceClass); }
创建应用上下文方法createApplicationContext方法 根据不同的环境信息通过反射获取创建不同阿上下文实例。 SpringApplication.class
1 2 3 4 5 6 7 8 9 10 11 12 13 14 15 16 17 18 19 20 21 22 23 24 25 public static final String DEFAULT_WEB_CONTEXT_CLASS = "org.springframework." + "boot.context.embedded.AnnotationConfigEmbeddedWebApplicationContext" ; private static final String[] WEB_ENVIRONMENT_CLASSES = { "javax.servlet.Servlet" , "org.springframework.web.context.ConfigurableWebApplicationContext" }; protected ConfigurableApplicationContext createApplicationContext () Class<?> contextClass = this .applicationContextClass; if (contextClass == null ) { try { contextClass = Class.forName(this .webEnvironment ? DEFAULT_WEB_CONTEXT_CLASS : DEFAULT_CONTEXT_CLASS); } catch (ClassNotFoundException ex) { throw new IllegalStateException( "Unable create a default ApplicationContext, " + "please specify an ApplicationContextClass" , ex); } } return (ConfigurableApplicationContext) BeanUtils.instantiate(contextClass); }
上下文前置的处理操作prepareContext()方法 prepareContext方法,主要就是为refresh做准备,将设置环境变量、通知listeners、注册特殊的Bean信息、设置BeanName生成器、资源加载器、调用前的初始化类的方法初始化,同时从资源里把Bean定义信息加载到Context对象中,为后续Bean实例化做准备。SpringApplication.class
1 2 3 4 5 6 7 8 9 10 11 12 13 14 15 16 17 18 19 20 21 22 23 24 25 26 27 28 29 30 31 32 33 34 35 36 37 38 39 40 41 42 43 44 45 46 47 48 49 50 51 52 53 54 55 56 57 58 59 private void prepareContext (ConfigurableApplicationContext context, ConfigurableEnvironment environment, SpringApplicationRunListeners listeners, ApplicationArguments applicationArguments, Banner printedBanner) context.setEnvironment(environment); postProcessApplicationContext(context); applyInitializers(context); listeners.contextPrepared(context); if (this .logStartupInfo) { logStartupInfo(context.getParent() == null ); logStartupProfileInfo(context); } context.getBeanFactory().registerSingleton("springApplicationArguments" , applicationArguments); if (printedBanner != null ) { context.getBeanFactory().registerSingleton("springBootBanner" , printedBanner); } Set<Object> sources = getSources(); Assert.notEmpty(sources, "Sources must not be empty" ); load(context, sources.toArray(new Object[sources.size()])); listeners.contextLoaded(context); } protected void postProcessApplicationContext (ConfigurableApplicationContext context) if (this .beanNameGenerator != null ) { context.getBeanFactory().registerSingleton( AnnotationConfigUtils.CONFIGURATION_BEAN_NAME_GENERATOR, this .beanNameGenerator); } if (this .resourceLoader != null ) { if (context instanceof GenericApplicationContext) { ((GenericApplicationContext) context) .setResourceLoader(this .resourceLoader); } if (context instanceof DefaultResourceLoader) { ((DefaultResourceLoader) context) .setClassLoader(this .resourceLoader.getClassLoader()); } } }
初始化SpringBoot,上下文在刷新之前。SpringApplication.class
1 2 3 4 5 6 7 8 9 10 11 12 13 14 15 16 17 @SuppressWarnings({ "rawtypes", "unchecked" }) protected void applyInitializers (ConfigurableApplicationContext context) for (ApplicationContextInitializer initializer : getInitializers()) { Class<?> requiredType = GenericTypeResolver.resolveTypeArgument( initializer.getClass(), ApplicationContextInitializer.class); Assert.isInstanceOf(requiredType, context, "Unable to call initializer." ); initializer.initialize(context); } }
加载bean信息到上下文中.BeanDefinitionLoader.class
1 2 3 4 5 6 7 8 9 10 11 12 13 14 15 16 17 18 19 20 21 22 23 24 25 26 27 28 29 30 31 32 33 34 35 36 37 38 39 40 41 42 43 44 45 46 47 48 49 50 51 protected void load (ApplicationContext context, Object[] sources) if (logger.isDebugEnabled()) { logger.debug( "Loading source " + StringUtils.arrayToCommaDelimitedString(sources)); } BeanDefinitionLoader loader = createBeanDefinitionLoader( getBeanDefinitionRegistry(context), sources); if (this .beanNameGenerator != null ) { loader.setBeanNameGenerator(this .beanNameGenerator); } if (this .resourceLoader != null ) { loader.setResourceLoader(this .resourceLoader); } if (this .environment != null ) { loader.setEnvironment(this .environment); } loader.load(); } private int load (Object source) Assert.notNull(source, "Source must not be null" ); if (source instanceof Class<?>) { return load((Class<?>) source); } if (source instanceof Resource) { return load((Resource) source); } if (source instanceof Package) { return load((Package) source); } if (source instanceof CharSequence) { return load((CharSequence) source); } throw new IllegalArgumentException("Invalid source type " + source.getClass()); }
刷新上下文之后操作afterRefresh()方法 将实现ApplicationRunner和CommandLineRunner接口在Bean初始化refresh之后进行调用操作SpringApplication.class,
1 2 3 4 5 6 7 8 9 10 11 12 13 14 15 16 17 18 19 20 21 22 23 24 25 26 27 28 29 30 31 32 33 34 35 36 37 38 protected void afterRefresh (ConfigurableApplicationContext context, ApplicationArguments args) callRunners(context, args); } private void callRunners (ApplicationContext context, ApplicationArguments args) List<Object> runners = new ArrayList<Object>(); runners.addAll(context.getBeansOfType(ApplicationRunner.class).values()); runners.addAll(context.getBeansOfType(CommandLineRunner.class).values()); AnnotationAwareOrderComparator.sort(runners); for (Object runner : new LinkedHashSet<Object>(runners)) { if (runner instanceof ApplicationRunner) { callRunner((ApplicationRunner) runner, args); } if (runner instanceof CommandLineRunner) { callRunner((CommandLineRunner) runner, args); } } } private void callRunner (ApplicationRunner runner, ApplicationArguments args) try { (runner).run(args); } catch (Exception ex) { throw new IllegalStateException("Failed to execute ApplicationRunner" , ex); } }
异常处理SpringApplication.class
1 2 3 4 5 6 7 8 9 10 11 12 13 14 15 16 17 18 19 20 21 22 23 24 25 26 27 28 29 30 31 32 33 34 35 36 37 38 private void handleRunFailure (ConfigurableApplicationContext context, SpringApplicationRunListeners listeners, FailureAnalyzers analyzers, Throwable exception) try { try { handleExitCode(context, exception); listeners.finished(context, exception); } finally { reportFailure(analyzers, exception); if (context != null ) { context.close(); } } } catch (Exception ex) { logger.warn("Unable to close ApplicationContext" , ex); } ReflectionUtils.rethrowRuntimeException(exception); } public static void rethrowRuntimeException (Throwable ex) if (ex instanceof RuntimeException) { throw (RuntimeException) ex; } if (ex instanceof Error) { throw (Error) ex; } throw new UndeclaredThrowableException(ex); }
获取SpringFactory实例代码 getSpringFactoriesInstances方法主要是加载spring.factories文件配置的信息(Java SPI的具体实现),返回值一般是类的名称SpringApplication.class
1 2 3 4 5 6 7 8 9 10 11 12 13 14 15 16 private <T> Collection<? extends T> getSpringFactoriesInstances(Class<T> type, Class<?>[] parameterTypes, Object... args) { ClassLoader classLoader = Thread.currentThread().getContextClassLoader(); Set<String> names = new LinkedHashSet<String>( SpringFactoriesLoader.loadFactoryNames(type, classLoader)); List<T> instances = createSpringFactoriesInstances(type, parameterTypes, classLoader, args, names); AnnotationAwareOrderComparator.sort(instances); return instances; }
加载SpringFactory的名字SpringFactoriesLoader.class 一般指的自定义的下的spring.factories。
1
2
3
4
5
6
7
8
9
10
11
12
13
14
15
16
17
18
19
20
21
22
23
24
25
public static final String FACTORIES_RESOURCE_LOCATION = "META-INF/spring.factories" ;public static List<String> loadFactoryNames (Class<?> factoryClass, ClassLoader classLoader) String factoryClassName = factoryClass.getName(); try { Enumeration<URL> urls = (classLoader != null ? classLoader.getResources(FACTORIES_RESOURCE_LOCATION) : ClassLoader.getSystemResources(FACTORIES_RESOURCE_LOCATION)); List<String> result = new ArrayList<String>(); while (urls.hasMoreElements()) { URL url = urls.nextElement(); Properties properties = PropertiesLoaderUtils.loadProperties(new UrlResource(url)); String factoryClassNames = properties.getProperty(factoryClassName); result.addAll(Arrays.asList(StringUtils.commaDelimitedListToStringArray(factoryClassNames))); } return result; } catch (IOException ex) { throw new IllegalArgumentException("Unable to load [" + factoryClass.getName() + "] factories from location [" + FACTORIES_RESOURCE_LOCATION + "]" , ex); } }
创建SpringFactory实例 SpringApplication.class
1 2 3 4 5 6 7 8 9 10 11 12 13 14 15 16 17 18 19 20 21 22 23 24 private <T> List<T> createSpringFactoriesInstances (Class<T> type, Class<?>[] parameterTypes, ClassLoader classLoader, Object[] args, Set<String> names) List<T> instances = new ArrayList<T>(names.size()); for (String name : names) { try { Class<?> instanceClass = ClassUtils.forName(name, classLoader); Assert.isAssignable(type, instanceClass); Constructor<?> constructor = instanceClass .getDeclaredConstructor(parameterTypes); T instance = (T) BeanUtils.instantiateClass(constructor, args); instances.add(instance); } catch (Throwable ex) { throw new IllegalArgumentException( "Cannot instantiate " + type + " : " + name, ex); } } return instances; }
自定义的SpringApplicationRunListener实现SpringApplicationRunListener接口定义的方法.
1
2
3
4
5
org.springframework.boot.SpringApplicationRunListener =\ com.qjq.data.listener.HelloApplicationRunListener org.springframework.boot.SpringApplicationRunListener =\ org.springframework.boot.context.event.EventPublishingRunListener
总结 SprinBoot的启动看下来还是有一定收获,能清晰的看到Spring的启动过程,在中间使用了很多钩子函数,方便其他组件的接入。同时与前面关于Web容器中启动相比,SpringBoot也有对两者环境判断和控制。SpringBoot我们能看出来这个从头到尾就使用了一个Bean容器,没有像SpringMVC做了两个。这使SpringBoot这种启动更加简洁,同时对Jar启动有了更多的认识。同时SpringFactories也对Java-SPI有更深层次的了解。这个十一假期也没有浪费。